[Ed-Seth: We have the great pleasure of employing the services and serving utensils of the original barbecuing bloggerati Joe Pichey of GoBlueBBQ to write recipes for our most delicious sponsor, Stubb's BBQ sauce. It is all over America so you have no excuse for not trying it yet. Consider this your patriotic duty.]
------------------------------------
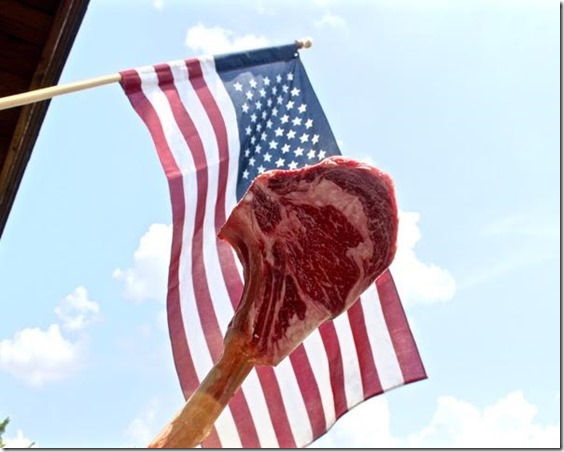
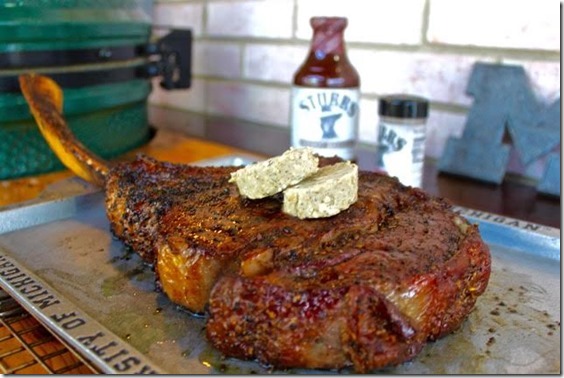
Since Stubbs wouldn’t approve my purchase of a small buffalo for this week’s recipe, I went with the next best thing. I went to my favorite local meat market and picked up this little 3.5 lb Prime Tomahawk Ribeye.
From the minute I walked in the door, Smokey Bones (The official GOBLUEBBQ pup) was by my side. This thing is massive and packs some huge flavor. I love a good ribeye and really liked how it turned out after dry brining. This was the first time dry brining for me and it will be the way to go moving forward. This will work on steaks, chicken, turkey and pork. The thicker the meat, the longer you brine it for. You can’t get much easier than that.
Ingredients
- Steak (1 - 2 inches thick works best)
- Kosher Salt (1/2 teaspoon per lb)
- Stubbs Steak Rub
[Things get salty after THE JUMP]
Directions:
Your dry brining time will depend on the thickness of your steak. If you go with a steak under an inch thick, you will only need 2-3 hours. If you can find a beast like this 3.5 LB tomahawk, go up to 24 hours. Without getting all "BBQ BRINE NERDY” in this post and putting everyone to sleep, here is the main benefit. The salt pulls some moisture from the interior of the steak, creating a moist exterior. After a few hours, the moisture soaks back into the meat and adds an extra layer of flavor. The salt also helps loosen the proteins which produces a more tender cut while retaining moisture. Still awake? If so, grab your meat and start sprinkling. I used kosher salt and went with almost 4 teaspoons of salt for this guy. I’ve read where you should use 1/2 teaspoon per pound of meat. Works for me.
Salt every inch of the steak. Once it’s fully covered, set on a rack that will allow for complete air circulation. A baking rack should work for most steaks.
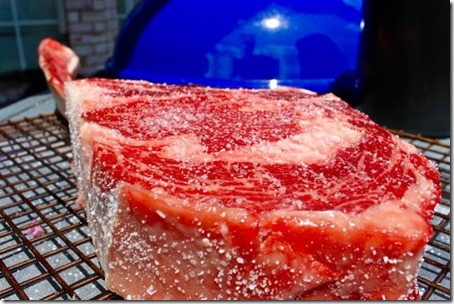
As you can see below, there is a good amount of salt on the steak. Don’t worry, this will not make your finished product overly salty. Trust me.
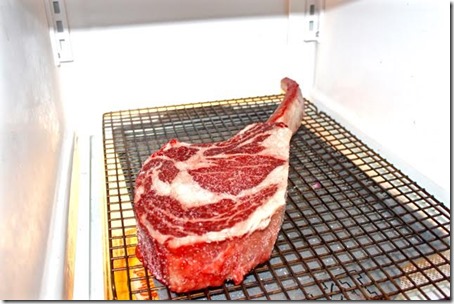
This one went into the fridge for 24 hours, uncovered and taunting me. It was placed on the “BEER SHELF” to soak in the goodness. I had to relocate my 12 pack from the fridge interior to my interior. I took one for the team on this day. You’re welcome.
After 24 hours, it’s time to fire up the grill. You can use a gas or charcoal grill for this one. If your steak is over 1.5 inches thick, I recommend going with the reverse sear method. I’ll explain how we do this in a sec. If its under 1.5 inches thick, grill it over direct heat.
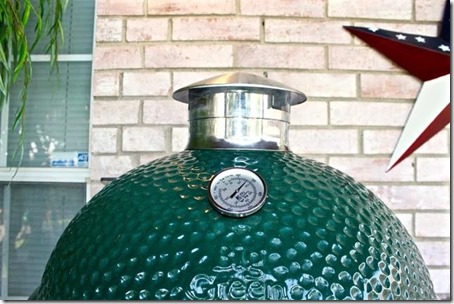
I set my grill for indirect heat and set it at 275 degrees. Anything between 250 - 275 works great. Add a few chunks of pecan or oak for smoke.
Just before tossing the meat into the grill, brush it with a little melted butter. This is not mandatory, but it does add some great color and a little flavor to the finished steak.
Season with Stubbs Steak seasoning, covering all areas again. Stubbs steak seasoning has a nice flavor and is not too salty. You can use it on meats, veggies and even baked potatoes. It really is an all-purpose seasoning.
Once the steak is seasoned and your grill is at temp, throw it on the grates. For reverse sear, we are cooking over indirect heat. I have a heat shield in between the hot coals and the meat. If you are cooking over direct heat, the shield is not needed. If you have a temperature probe, use it. Since this steak was super thick, I used mine to monitor the internal temperature. I prefer my steaks medium rare, so I left it in until we hit 125 degrees internal.
After about 45 minutes to an hour, the steak reached 125 degrees. This is still a RARE steak at this point.
[Slap away any hands; we are not finished.]
Now it’s time to have some fun and add some char. You all know how much I love the charred exterior. Turn up the temp of your grill by opening all of the vents and removing any heat shields you have in place. We want this grill HOT!!!! Mine took about 7 minutes to reach 700 degrees.
Once the flames are roaring, place the steak over direct heat. Let the flames kiss it a little. I went 60 seconds each side.The temp probe was still in and went to 133 degrees after 2 minutes. Remember, once removed, the steak temperature will continue to rise. This one finished at 138 degrees after resting.
Here is the finished product after 70 minutes of work. At this point, the steak needs to rest for about 15 minutes. Tent with foil and grab a barley pop while you wait.
I made some compound butter for the top, but it honestly didn’t need it. This was just 1 stick of butter (room temp) and some blue cheese crumbles mixed together and refrigerated until solid.
After 15 minutes of rest, separate the meat from the bone. Slice as you see below and enjoy. This thing was fork tender and a perfect medium rare.
I was shocked at how deep the salt brine penetrated this huge cut of meat. I really could taste it throughout the entire steak.
Give this method a shot on a nice 16 oz ribeye or T-Bone steak for this next game. Add a few baked or smoked potatoes and you may not make past halftime. A nap may be in order, but hopefully, the game will be out of reach by then anyways. GO BLUE!!!!

